• Skip to main content
ModFarm Design

ModFarm Design

We Build Author Websites

  • Home
  • About
    • Blog
  • Services
    • Design
    • Concierge Support
    • Site Management
    • eNewsletter
  • Portfolio
  • Contact
  • Pricing
  • FAQ

How To

How To Duplicate A Post

February 4, 2025 by Rob McClellan Leave a Comment

When you’re repeatedly posting the same things – like a new release post or a coming soon or something else that’s very standard – you might want to save yourself some work in formatting and just… duplicate the post.

This is a surprisingly easy thing to do in modern WordPress, and I’m going to show you two ways to do so. One way uses a duplication plugin and the other uses the native block functionality in WordPress.

First, using a plugin.

Duplicating A Post With A Plugin

There are lots of plugins out there in the WordPress repository, but when it comes to duplicating a plugin, there is one that makes it all effortless while the remaining utterly behind the scenes. . No settings, no options – just does what it says it does. This is the Post Duplicator plugin by Metaphor Creations. It’s free, simple, and works very well.

To use it, add it to your website via the Plugins function in your website and activate the plugin. Once that’s done, go to the Posts->All Posts section of your website’s dashboard. At that screen, you’ll see all of your existing blog posts. Go to the one you want to duplicate and hover your cursor over the title. This brings up some options and will look like the screenshot below.

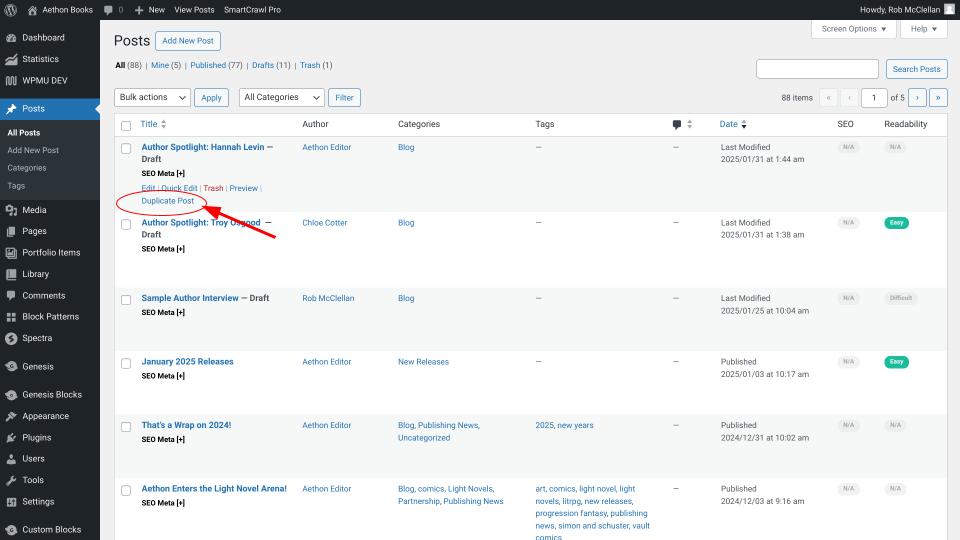
Click on the “Duplicate Post” option, highlighted in the image, and voila! The post will be duplicated.

From there, go to the post and edit it to make changes to reflect what you want the new post to be.

Save and publish when ready. Easy Peasy.

Copy All Blocks

When WordPress went to a block based editor, it opened up the door to manipulate content in ways that it never could have before. One of those ways is to “Copy All Blocks” which is a very useful function and makes it very easy to duplicate a post without a plugin very quickly and very easily.

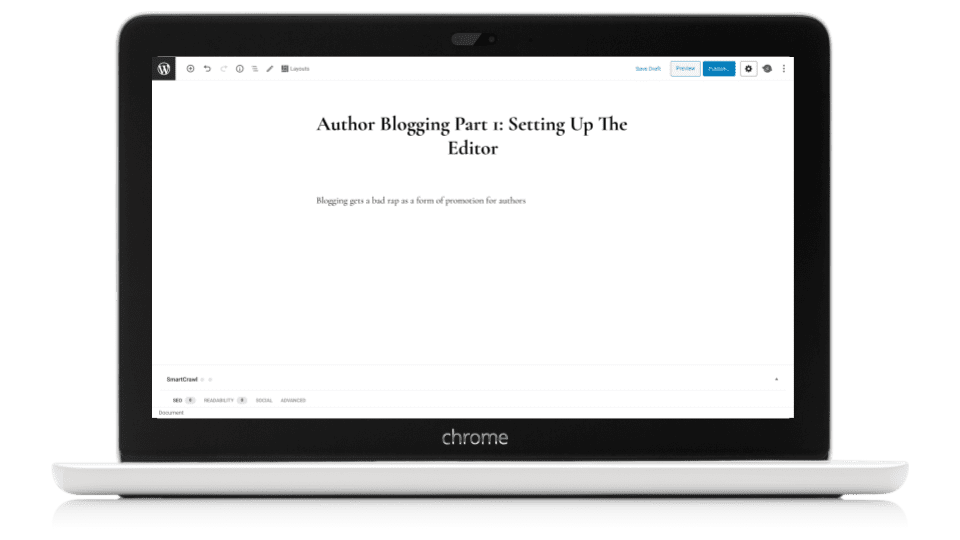
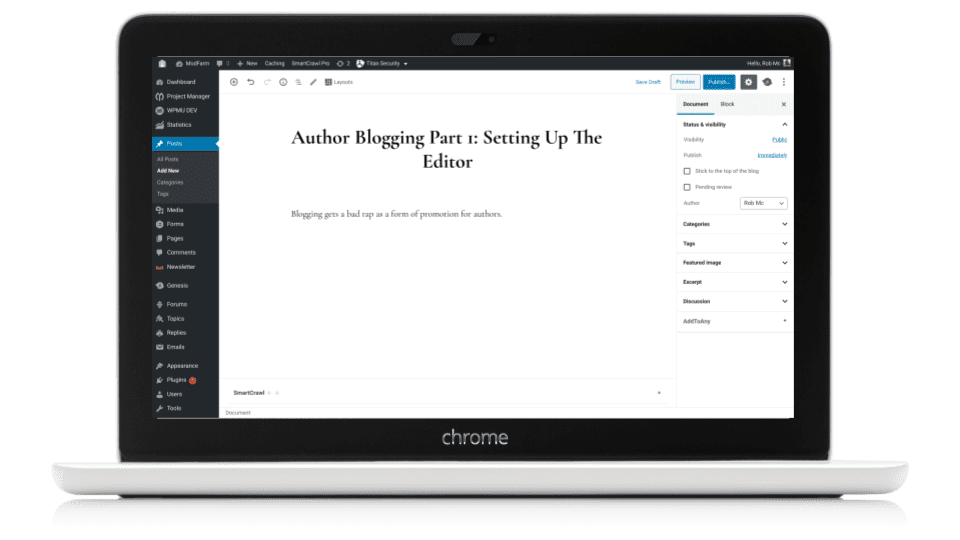
To do this, go to a Post or Page you want to duplicate and click to “Edit” that post so you can see it in the post editor, much like the screenshot below.

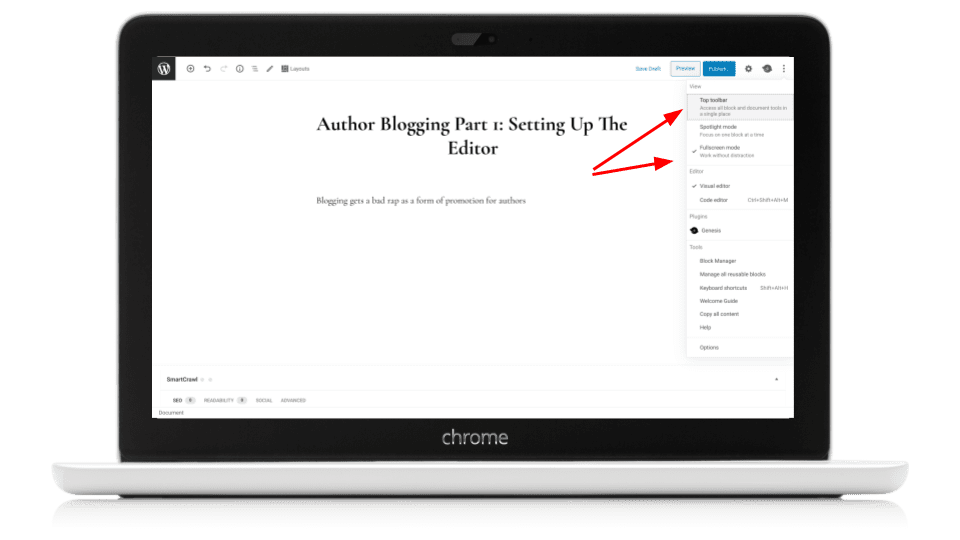
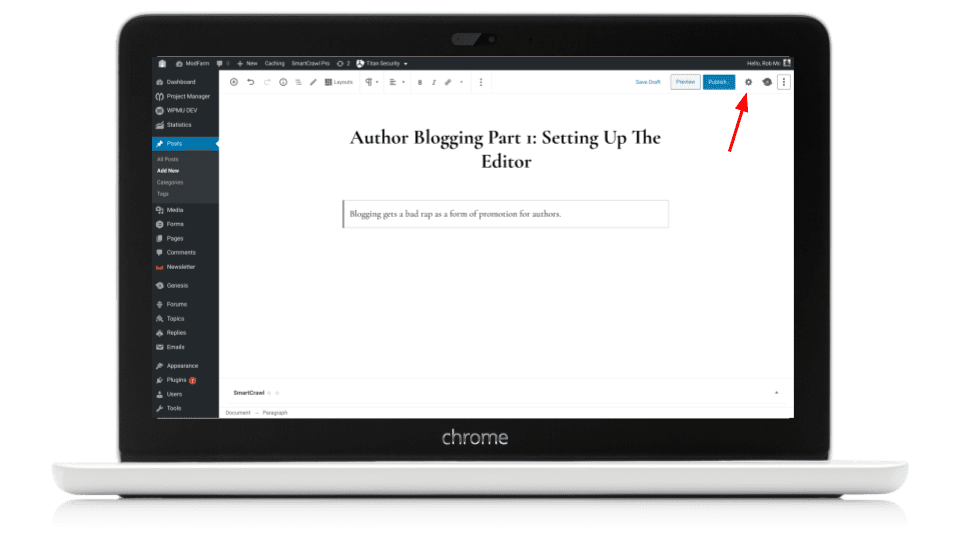
Once in the editor of the content you want to duplicate, you can click the “Three Dot” edit menu in the top right corner of the screen and then select the “Copy All Blocks” option. This will copy everything that exists in the Page or Post.

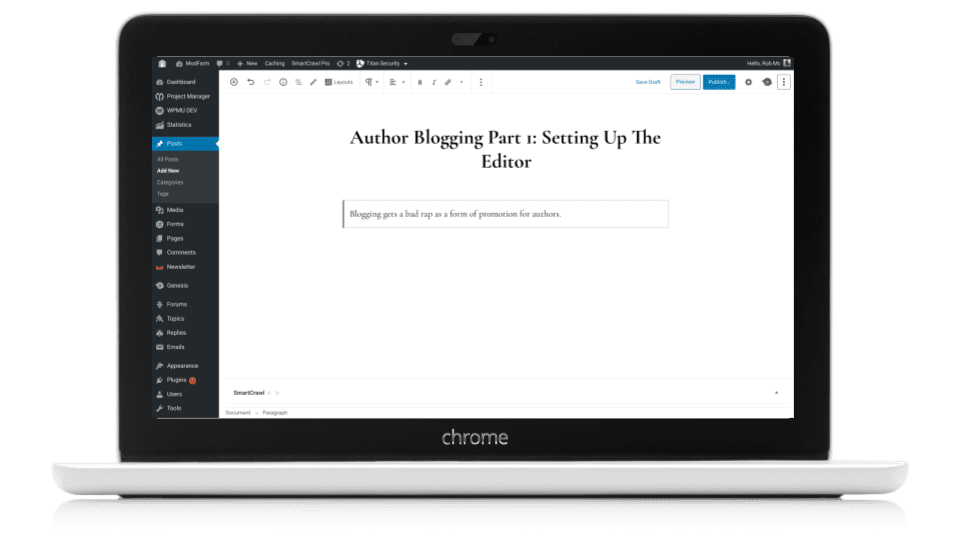
You can then go to click on “New” at the top of the screen and select the type of content you want to create (eg a New Post) and then, in that editor screen, simply “Paste” the blocks you just copied. Once done, you’ll see it duplicated the content perfectly.

This is actually my preferred method to duplicate content. Works perfectly every time.

Special Bonus: Patterns

Another function of the block editor is the option to create a pattern that can be reused. This comes in very handy when you want to create content that has the same layout, but you don’t want to keep editing and writing over the duplicated content. You just want the layout, giving you the ability to free in all of the rest.

You do that by going to Post->Add New Post and open up a fresh editing screen.

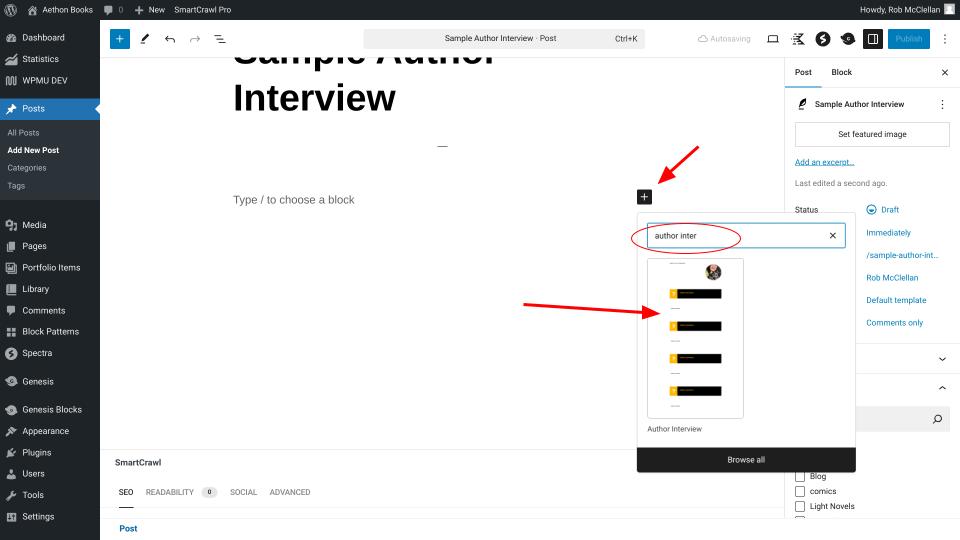
In the post editor, you’ll see the little black box with a plus in it. That is the insert function of blocks and patterns. Clicking on that opens up the block modal that lets you find the block or pattern you’re looking for. Since there are usually dozens of such items in your website, I find it easier and faster to use the search function to find what you’re looking for.

In this example, shown above, I searched for the “author interview” pattern – and it is dynamic search, so you don’t even have to type the whole term in to find what you want.

Once you see the block or pattern you want to use, just click on it.

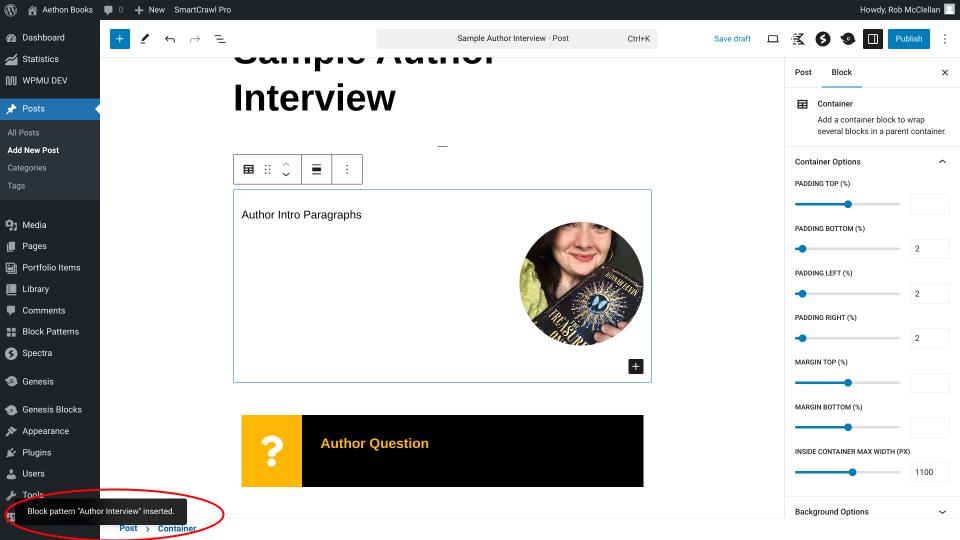
As you can see, once the pattern is clicked it will be inserted right into the post and you can just edit it as you need to from there. It even gives you a nice little notification to let you know the action it took.

Simple, effective, repeatable.

I use this function a lot when for adding new book pages to websites. I build that pattern when designing the site and then apply it each time a new book is added. Works really, really well.

Wrap Up

And that’s it – this little How To is a short and sweet one that I hope you find useful

Filed Under: How To

Email For Authors

February 2, 2025 by Rob McClellan 1 Comment

I have spent a lot of time on author email, lately.

Like, A LOT.

In fact, author email has been the most worked item for ModFarm Support over the last 6 months. In reflecting on this, this stems from a combination of reasons, and, even more so, a combination of misconceptions.

Resulting from all of this, I’ve put together my recommendations for Author Email: what works best, what to do, and how to do it.

Ready? Let’s do this!

The Search For Branded Email

Nearly 100% of the author email problems I’ve encountered center around branded emails.

A branded email is something that looks like name@authorname.com. Everyone wants these as they feel it’s important for branding. However, most services these days charge for this, anywhere from $4/mo to $22/mo depending on what the author wants. And this is where the problem arises, as most authors don’t want to pay for this, they look to all kinds of ways to not – from using host provided webmail to signing up for bargain basement services.

As a service provider, I try and help authors with what they need – they say they want branded email, I do my best to help them. Which, on my end, usually means adding the required DNS records to their domains.

But, I’ve begun to reconsider this. I’ve begun to think that maybe that’s not helping. Maybe that’s making things worse.

I now think that the best way to help authors with their email needs is not to simply enter in the DNS records they send me. Perhaps, instead, the best thing I can do is revisit the assumptions and provide a better path for not only branded email, but for their entire email strategy.

One that’s safer, more effective, more efficient, and, almost always, completely free.

First, A Little About Email

Email is old tech. It is, arguably, the original framework of the internet. When a certain presidential candidate was saying he invented the internet, he was meaning modern email – not the world wide web (and he was incorrect anyway – just sayin’).

The original internet was created as an information messaging backbone for communicating after the world had gone to hell. It was devised as a way for universities and government to communicate and share necessary information for survival of some pretty bad scenarios. This groundbreaking solution was email. The first of which was sent in 1971 over the original ARPANET.

Bottom line: It’s old. As old as the web can get.

The good news is that means email is incredibly reliable – it works and works and works. As far as communication backbones go, it’s practically bulletproof.

The bad news is it’s very old. And, like many old things (and people), it’s crotchety, particular, and not overly flexible. Basically, it is what it is and it ain’t going to change.

It’s governed by a particular DNS record type called MX (Mail Exchange). Domains only get one MX record. I’m going to say that again louder: You only get ONE MX record.

Because email is so old and basic, as the web (and its predators) expanded, more tools were brought into play to ensure an email was real. This is where things like SPF, DKIM, and Domain Verification come into play. Also, as email needs expanded (images along with text, mass delivery, tracking codes, etc), services were created to manage, filter, and protect people from malicious email. And then to report about said malicious email. And then to report on the reporting of said emails (ie DMARC).

All of these are governed by various DNS records at the domain level – TXT and CNAME records are the usual means for those. So, to verify a domain, an email provider may want you to add a TXT record with some code to verify the domain, and then a few CNAME records to provide DKIM authentication, and maybe another TXT record for SPF authentication. And, then yet another TXT record for DMARC authentication.

However, even this wasn’t enough. Google, as part of its groundbreaking Gmail service, put scanning tools in place to automatically understand, categorize, filter, and profit off of email. That’s why you have Primary, Promotion, and Social email inboxes. Those tools, over the years, got a little more refined, adopted a little AI, and got more aggressive against spammers – which not only annoy users, but also compete against Google’s Gmail based advertising systems.

Email is old but, as you can see and experience, over the last 50+ years it has had systems upon systems layered on top of it.

Now, back to how email can be made easier for everyone…

Author Email the ModFarm Way

Authors have several requirements for their email, and they’re similar to any other business.

  1. It needs to work and be hassle free
  2. Easy to use and set up
  3. Branded emails for marketing purposes
  4. Branded emails for Newsletter sending purposes
  5. Not trip any email spam/filtering services
  6. Cheap or free

To these I would also add the following:

  1. Convenient to use
  2. Hosting independent
  3. Built in housekeeping/organization

When I say “convenient to use” what I mean is its easily accessible to any device at any time – usually through an app.

“Hosting independent” means you should be able to migrate your website to new hosting services without complicated export/import procedures or outright loss of your email data.

And “housekeeping/organization” means that the email process you choose should make your life and business more organized and efficient and not less. You shouldn’t have to work very hard to check your email.

Given all this, how to best go about it? How can authors set up their email to accomplish ALL of these goals?

Well, we’ve figured that out. A way to – no joke, no bullshit – leverage email and its various systems to achieve ALL email objectives, including keeping it free.

We start by throwing out your assumptions.

What You Actually Need vs What You Think You Need

The usual request for email support comes in as something very similar to this: “Mail Service X requires I have a branded email address to send my newsletters. Give me branded email.“

To this, I give an answer similar to: “Do you want full email or forwarded email? Full email requires an email client and forwarded email we just connect a fake branded email to your current email.“

Authors, almost without fail, request “full email.” And, I realize this is largely my fault as when phrased as it is above, full email seems like the better option.

It isn’t. At all.

That sounds cryptic, I know. The reason I say this is that full email is more complicated to set up, requires more infrastructure, is less flexible, is less expandable, and, generally costs more.

For most authors, it would have very little benefit over alternatives – and can even be detrimental in most cases.

Remember, you only really need branded email for sending newsletters. That’s what you NEED it for. It’s also really easy to have on a business card or to use at cons and personal meets and stuff like that. Anything beyond that is just gravy.

The key here is to stay focused on what you need, not what you think you need to do to go about getting it. Let the actual requirements drive the solution instead of the perceived solution dictating your actions.

To that end, I recommend adopting a Core Email Address with a major provider (Gmail, Outlook, or Proton) and then use Forwarding Email Addresses to provide the necessary branding.

How would that work? I’ll make up a hypothetical example and walk you through it.

Set Yourself Up For Success

The basic idea is to have a single Core Email Address and then funnel things to it.

To do this, the first thing you’ll do is set up a free Gmail account that looks something like this: authorname@gmail.com

Now, that part’s done. This email address can both send and receive, which is a majority of your functionality. You now have a working email address that has your author name and/or pen name or sobriquet in it. It is recognizable as you. This is your Core Email Address.

Next, we add in the branding part. This is done by creating a Forwarding Email Address. You would do this from your site’s hosting. The primary purpose of this first forwarded email is to have a branded email address that can be used as a sending address for your Newsletter. This will use up your one allotted MX record, but it allows you to make an infinite number of email addresses.

To create this, you would go to your website host and follow the directions for a Forwarded Email Address. That email would look something like this: me@authorname.com and it would be forwarded to authorname@gmail.com which means anything send to me@authorname.com will automatically, through the magic of DNS records and internet protocols, be delivered to authorname@gmail.com

And that is done. You have a functional email (authorname@gmail.com) and a branded email (me@authorname.com). You can now do the things you absolutely need to do. And, you still only have one single email account to manage. Everything is going to the Core Email Address. There are no other inboxes or accounts. It’s all in one place.

To validate this new branded sending email for your Newsletter service, you would follow your newsletter’s validation directions and enter the DNS records they specify into your website’s DNS records. This will most likely be a TXT record for SPF and multiple CNAME records for DKIM. If you don’t already have one, you’ll also need to enter a TXT record for DMARC. Your newsletter service will have directions for all of this.

Easy Expansion

At this point, we can talk about scaling.

For example, you might want to have, for marketing purposes, several other branded emails. contact@authorname.com for example. Maybe you have had some success and want to bring on an assistant. Maybe you have an expediter for your online store and you want them copied in. Maybe a marketing partner. There are dozens of reasons to expand your branded email.

And, it’s very easy to do with forwarding email. Just go create more Forwarding Email Addresses. Have contact@authorname.com go to your assistant’s email at yourassistant@gmail.com. Create sales@authorname.com go to your expediter at yourexpediter@gmail.com.

Once created, anytime an email is sent to those email addresses, it goes straight to your team’s respective emails. No muss, no fuss.

It is infinitely expandable. Most hosts have no limit to forwarding emails – I know we at ModFarm don’t. You can build up and scale as large as you need to. For free.

Resist Complication and Embrace Simplicity

At this point is where authors bring in complications. “How can I send an email as me@authorname.com?” is a common question.

Normally, I provide links on how to create alias emails via whatever service they are using and things break down in a hurry.

So, I’m not going to do that here. Instead, I’m going to ask a very simple question: Why do you want to do that?

Seriously. Why do you feel this is important? Do you think your readers care what the email address is? I’ve known a lot of very successful authors who have communicated for years and years with their clients, publishers, con personnel, publicists, and everyone else in their professional sphere with a simple Gmail address: authorname@gmail.com.

Do you really think your assistant needs branded email? Your expediter? Anyone?

The answer is very simple: no, they do not. Nor do you.

If you want to do that, go ahead. It’s totally fine. Spend $22/mo for maxxed out Google Workspace if you want to – it’s totally up to you. But that is a personal choice and has no bearing, whatsoever, with communicating with your readers or your team or anyone else in your professional life.

I recommend, most strongly, that authors look to their actual needs when making professional decisions.

By using a Core Email Address and leveraging Forwarding Email Addresses, you are setting yourself up for a very long term and extremely easy communications strategy that will scale as you grow and will remain flexible as your team changes.

For example, if contact@authorname.com is forwarded to your assistant at assistant@gmail.com and two years from now your assistant changes careers and you get a new assistant – you don’t need to add a new team member to WorkSpace, pay an extra seat fee, and change everything you have to newcontact@authorname.com. All you have to do is change the destination of the Forwarding Email Address to the new assistant’s email at newassistant@gmail.com. Everything else remains the same. No changes to websites, business cards, online forms, or anything else. It’s smooth and immediate and completely free.

Using An Alias

Even after the above, there will be those who just can’t let it go and their OCD will drive them crazy if they can’t send an email as me@authorname.com.

I get it. I do. And, so do the major email providers.

They do this by creating an Alias. This is just what it sounds like – it substitutes an external email address in the header block of your primary email address. Or to put it in the lingo of this post, it gives you the option of making email sent from authorname@gmail.com look like it was sent by me@authorname.com.

This gives the appearance of full branded email without any of the cost or headaches of having full branded email.

There is a downside, though. It can be complicated to set up.

Here is Gmail’s directions on creating an Alias. And here is Gmail’s directions on using that Alias as the sending address. The other major providers have similar directions for creating and using an Alias email address.

Do you need to do this? No, you do not. You do not need to have an Alias or any kind of sending power to use your Forwarding Email Address to send emails via your Newsletter Service. You do not need an Alias to do anything. However, if you want to create one and use it as a sending address, there are ways to do so.

But, I caution you, setting up an Alias gets surprisingly complicated and the major tech companies are not known for their customer service. I repeat: an Alias is absolutely NOT necessary.

Getting Organized

Most email providers allow for smart folders. These are folders set up with rules on what to do with incoming email.

For example, anything sent from sales@authorname.com could be automatically sent to a “Website Sales” folder in your Core Email Address’ Inbox.

Same for any other kind of incoming email. contact@authorname.com could go to a Smart Folder for that purpose.

The idea here is to use the inherent means of the major email providers to simplify and organize your business. To keep everything neat, tidy, and easy to find.

Forwarding emails also allow you to have more control over your digital destiny. For example, you are hosting your website with Dreamhost and you are unhappy with them and want to switch to another hosting company. But, your branded email is via Dreamhost’s webmail that was so nicely included in the hosting package. If you change hosts, you lose access to this email, and migrating from webmail is an absolute mess. You’re effectively trapped – which is why they provided that sucky free webmail.

But, if you have a Core Email Address with a major provider, you can change hosts at any time. Just change. Once you get there, add the same forwarding addresses you had at the previous host and everything will proceed as if nothing had ever happened at all. No one would know anything had changed and your emails would be perfectly preserved.

Wrapping Up

As you can probably see by now, the purpose of all of this is to use the email systems to empower yourself as an author and a businessperson.

If you set it up properly, you can reduce stress, cost, and give yourself more freedom and capability. You can effortlessly expand your team, organize your correspondence, and generally make life a lot easier for yourself.

Email does not have to be complicated. Stick to what you need and you’ll be better off than you think.

Filed Under: How To

Author Blogging Part 1: Setting Up The Editor

April 17, 2020 by Rob McClellan Leave a Comment

WordPress makes blogging very easy, so much so there’s no wonder why its the platform behind 30% of the sites on the internet. From your local restaurant to the New York Times, a tremendous number of sites are built on the WordPress platform. And, chances are, your author site is built on it, too.

But, because it is so powerful and flexible, the initial the editing screen is almost entirely blank, leaving it to you to set things up to best serve the needs of your own website.

In this first part of our series on author blogging, we’ll go over how to set up your website’s editor so that you can easily see and access all of the tools you will need to craft content that can be properly shared on social media, indexed by blog posts, and organized on your website.

We’re also going to go over the additional tools/plugins you will need to install in your site to enable all of these necessary functions.

First, we start with the editor…

Setting Up Your Content Editor

Your stock WordPress editor.

With the latest update of WordPress (5.4), the editor defaults to a widescreen, full page set up, exactly like the above image. While this is a really nice looking page, and makes writing and constructing posts and pages pretty easy, it hides all of the essential stuff we’ll need to organize and market your blog posts and pages.

So, the first thing to do is get your editor ready to work.

We’ll do that by getting out of the full screen editor and activating your settings panel. I’ll walk you through that in the following screen shorts. It only takes a couple of clicks and, once you do it, your site will remember your preferences and you’ll never have to do it again.

Step 1: Open Up Your Editor Settings

You’ll see up in the top right hand corner a little three dot icon. That is the editor settings panel. Go ahead and click on that and open it up.

Step 2: Change Your Editor Settings

With the editor settings now exposed, you’ll see you have a few options here. I recommend you de-select the “Fullscreen Mode” and enable the “Top Toolbar.” Making these two changes will bring the dashboard back into view and puts the majority of the editing controls across the top of the screen in what is the closest version of the “ribbon” controls popular in MS Word and Google Docs. The result is a screen that looks like this:

If you find you prefer the Fullscreen Mode better than seeing the dashboard elements, no worries, just click on the three dots again and change your preference back. Same with the Top Toolbar option. It’s all about your personal preference. For me, personally, this set up is much more familiar and comfortable to use.

The next steps, however, are very important and I don’t recommend changing out of them.

Step 3: Activate Your Post Settings Panel

Now, turn your eyes back towards the top right corner of the page editor screen. You see that little icon that looks like a gear? Near the blue “Publish” button? Yup, that’s the one. Go ahead and click on that to activate the settings panel, which will look like this:

From now on, leave the settings panel open. That panel serves two functions: Document Settings and Block Settings.

When you are working in an individual element (ie a “block”) on the page, be it a heading, an image, a button, whatever, the settings for that block will appear along the right side of your screen in that Settings Panel.

And, when you are getting ready to publish your blog post, this panel has the necessary document level meta data you will need for your post to be effective. Things like Categories, Tags, Featured Image, and Excerpt.

Depending on your theme and plugins, there might even be other controls there like controlling the comments, social sharing buttons, and other things like that.

Adding The Extra Tools

While the WordPress editor is an impressive interface and a nice piece of code, it does lack a few things right out of the box that are important for ensuring your posts and pages are properly indexed for search and formatted for social.

To get these very deisrable extras, you will have to add in and activate some plugins.

Plugins are small programs that you can add to your website that provide extra functionality. If your website were a house, plugins will be all of the appliances. Sure, you don’t have to have things like a refrigerator, oven, dishwasher and coffee maker to live, but they sure do make living a lot easier. This is the same concept.

At ModFarm we provide the premium versions of these plugins to our clients, but if you’re on a budget you might be able to work with the free versions if you’re willing to sacrifice a few bells and whistles.

I’m not going to go through how to install plugins here, but if you go to this link you can get directions straight from WordPress itself.

Plugins We Recommend

We’re looking at plugins that will help you tailor your SEO (Search Engine Optimization), specify your social media meta-data, assign images, and speed delivery. Here is what we recommend you install (you only need one for each category):

SEO: SmartCrawl Pro by WPMU or Yoast SEO

Social Media Metadata: SmartCrawl by WPMU or Yoast SEO

Social Sharing: AddtoAny, Hustle by WPMU

Speed Enhancements: Smush Pro, Hummingbird Pro, WP Total Cache

Slide-Ins/Pop-Outs: Hustle by WPMU, Thrive Leads, Bloom

You will also need a newsletter system to fully utilize our method. You can use something inside of your site, like MailPoet or Newsletter, or external like MailChimp, Mailerlite, or something similar. Whichever you choose, the important thing is that it has the ability to send emails based on RSS.

ModFarm clients have the option to use our in-house email system that interfaces directly with their website, making a bunch of things we’ll be doing just a little bit easier.

Summary

With these few additional plugins and simple changes to your editing screen, you can unlock a lot more capability for writing and organizing your blog posts.

In the next part of this series on author blogging, we’ll dive into how to use WordPress’ powerful block editor, Gutenberg, to place your blog posts 4 essential elements.

Filed Under: How To

Sell More Books While Spending Less On Ads

April 17, 2020 by Rob McClellan Leave a Comment

Ever have one of the things happen in your life that completely challenges your belief in something you had taken for truth?

I have. For me, it was a cheeseburger, and it changed my entire concept of author websites and book marketing.

[Read more…] about Sell More Books While Spending Less On Ads

Filed Under: How To

Author Websites vs Amazon

April 14, 2020 by Rob McClellan 2 Comments

Whenever I’m talking with authors about websites and how to use them, the question of whether to share the link to the book on their site or to the book on Amazon almost always comes up.

The reality is these sites have fairly similar purposes, but the philosophy behind them is very different. And that difference is very important to understand.

For the author, their site is to inform the reader about their book(s) and then direct them to a sale. Amazon is just there to sell books – not necessarily yours.

Using a ModFarm Book Page as an example (The Long Sword by Christian Cameron), here are the explicit differences between an author’s website and Amazon, screen-by-screen.

This is the first screen you see when you land on a book page (left) or Amazon (right).

Right off the bat, you can see a pretty severe difference between what each site is trying to accomplish.

The Author Website’s goal is to inform a potential reader about the book in order to convince them to buy it. Amazon’s goal is to process a sale for a customer who has already decided to buy.

Amazon is not trying to convince a reader to buy a book, it is there to process the transaction. You can see this from how little information about the book is presented. Amazon uses more screen real estate to serve two banner ads – neither for one of the author’s books – than to describe the book that is central to the page.

Things change dramatically on the second screen.

Once you scroll down a bit from that initial landing screen, the difference between the two philosophies becomes starkly apparent.

The author’s book page presents actions. The reader has had a chance to see what the book is about and now options are presented: Buy Now, Read A Sample, Add To Goodreads, or See The Full Series. Not to mention the audiobook and links to buy it, which, being icons, also serves to let the reader know where they can buy it in the future.

Amazon, on the other hand, has written off the purchase and moved on to other alternatives, serving the customer with an entire screen of other books to choose from. Remember, Amazon’s goal is to sell A book, not YOUR book specifically.

If the potential reader didn’t take the bait on the first screen, then Amazon’s assumption is they are looking for a book but weren’t satisfied with the first offering.

Screen three brings the two sites back into more of an alignment.

The third screen brings things back into more alignment between the two, but for entirely different reasons.

For the author website, this screen starts bringing social proof into the equation as a means to bolster confidence in the book and get the potential reader to reconsider the book and get back on the “Buy Now” track.

For Amazon it is a way to present what they consider low level information. This page is the “publisher” space and gives some room for the publisher to make their pitch, which is commonly a string of reviews. But, remember, this screen comes after the one prior – the one full of alternative books.

Amazon’s concept for this screen is similar to that of the author website’s, which is that the reader didn’t buy the book, but passed on other options, so they must be looking for more information. And so they give the publisher (or author, if self published) a space to make their pitch to try and get a sale.

Screen 4 is where each side looks to redirect the viewer to other options.

Screen four is where both sides give up, quite frankly.

The author site shows the reader some of the other books by the author that might interest them, in this case a randomized sampling of the author’s catalog from that same genre (historical fiction).

Amazon presents a large banner ad. It has decided that if the reader hasn’t selected and bought a book by now, its not really that interested in buying a book today so why not try something else.

Screen 5 is the bottom of the page, with each site using this area for very different purposes.

The last screen in both cases is for linked content from a previous screen.

For the author website, this is where the buy links, connected to the big red “Buy Now” button at the top, are placed. This area of the book page provides enough screen area to hold all of the myriad options of buying a “wide” book, both in terms of the various retailers, but also formats (ebook, audiobook, and hardcopy).

Amazon uses this area to house reviews, connected to the star rating at the very top of their first screen.

“Which Do I Share?”

All things being equal, authors should share the link to the book on their website over sharing the link to Amazon.

A well crafted book page on an author website performs better than an Amazon page in terms of clicks. With ModFarm sites, even our worst performing book page converts at the same rate of an Amazon page (about 16%), but some pages work considerably better (our highest performer is currently at 42%).

If the book is a wide release, sharing to the book page on your website provides the various purchase options that Amazon is not going to provide.

For authors with wide books, having the various purchase options well presented and available on their website makes a big difference in sales. Examining ModFarm author site clicks over the past three months, the cumulative clicks to other retailers adds up to the same number of sales directed to Amazon. In effect, directing readers to their book page instead of to Amazon can potentially double a wide author’s earnings.

The caveat here is “all things being equal” and the reality is that many author websites do not have book pages that are designed to sell books. A surprising number don’t have book pages on their websites at all. If that is the case, then there is little other option than to share the link directly to the retailer.

Some Extra Tools

If the author website has the ability to tailor how its content shows on search engines and social media, then authors can make their website links more of a sales tool by customizing the display image and text, something that can’t be done with links from Amazon or other retailers. Here’s an example of that from Scott Moon’s Shortyverse series page, recently shared on Twitter:

In addition, when more readers are directed to an author’s website, they get exposed to the amount of information on that site. If the site is well constructed and has a lot of information they want (largely book information), then they view the site as a resource, checking it more often for updates, increasing the site’s SEO, and reducing the need for advertising over time.

In Summary

An Amazon page is most effective when the people visiting it have already decided to buy. An author website’s book page, if well made, is better at convincing undecided people to buy a book than an Amazon page is.

This is due primarily to the difference in philosophy. An author site wants to sell a specific book, Amazon just wants to sell a book and if the reader passes on the first option, its algorithm quickly offers another twenty similar options.

If a book is a wide release, sharing a dedicated book page from an author website that contains the various purchase links is the best choice by far. A distant second is something like a Books2Read page, that has the purchase options but not the sales architecture.

If an author’s website does not contain a dedicated book page, then sharing directly to a retailer, be it Amazon or any other, is the only remaining option.

Filed Under: How To

Why You Should Never Use A Newsletter Provider’s Landing Page

April 6, 2020 by Rob McClellan Leave a Comment

Beautiful, Easy, and Deadly… It’s a Trap!

Its a pretty common scenario. You are an author looking to increase your sales and you start talking with other authors on how to go about doing that. They all say “get a newsletter” and they recommend services like MailChimp or MailerLite.

So you head over to their website, see that there’s a free tier, and you sign up and get going.

During that sign up process, your newsletter of choice hits you up with the fantastic offer of a free landing page that you can build yourself with a simple drag and drop system. You, not being a great web designer, say “sounds great!’ and build that puppy right up. They give you an indecipherable link like eeepurl438.com and you move along full speed ahead.

In the next two weeks you update all of your book’s back matter to direct new readers to that absolutely awesome landing page. You share that link to your friends. Things are happening, sign ups are moving.

Then, after a couple of months, the free tier runs out.

But, that’s a good thing, right? You’ve got signups!

However, now that it’s your money on the line, you pay attention to that balance sheet and start shopping around for other services. Because while you are right on the 20booksto50k path, you’re still not in the realm of full time, 6-figure author happiness and each dollar still matters.

Then, your search pays off and you find a cheaper plan! Sweet!

Where you got that cheaper plan doesn’t matter, because they gave you a different link.

You’re not eeepurl438.com any more. Now your eeepurl794.com.

It’s not the same as your old link. Oh, f#%&.

The link you’ve embedded in all of your books (11 and counting with a new one that just got formatted) will no longer work. You’ll have to swap all of that back matter to get the new, reduced pricing.

Quickly, you do a double check and decide that changing all of those links just isn’t worth the cash you’re going to save on the new, cheaper plan.

Maybe that landing page was a bigger decision than you thought.

Maybe there was a better way to go about setting that up.

Maybe… It was a trap.

Claim Your Power!

Always use a page on your own website for newsletter sign ups.

The landing page, the website, the whole deal – those are traps that newsletter providers have built up to make moving away from their system as difficult and costly as possible. They want that change threshold to be maxxed out as high as they can get it. Because that is what prevents you from leaving and keeps you in their system forever.

Never take the landing page option!

And definitely never – ever! – take their “website” option…

The best thing to do is to build a dedicated page on your own website – call it “newsletter” or “readers club” or “VIP” – doesn’t matter what you call it for now. What’s important is that it is a) on your website and b) it’s own page. That means it has a URL that looks like this: mydomain.com/newsletter

Why is that so important? Because YOU own that! That is YOURS. You will never have to change that link, ever. It’s all yours and it is as permanent as you want it to be.

If you are a decent hand at tech, go ahead and make a custom form that connects to your newsletter system of choice. There are several plugins that provide that kind of functionality (we like Gravity Forms, Hustle, and SeedProd Pro, but there are other options out there). Once that’s done, you’re all set – for life!

Not very technically savvy? Hey, it’s OK, no shame. Take the “embed” option.

When you are setting up your newsletter service, your newsletter provider will offer you a snippet of code that contains your sign up form. Copy that code and paste it into the dedicated page you just made on your website.

And now you have an email newsletter signup form that empowers you instead of traps you.

Want to change newsletter providers in the future? No problem!

With the link to your newsletter on something permanent that you own, shop around and switch providers with full confidence. When you find a new provider with a plan you like, just erase the old embed code and replace it with the new one.

Easy peasy.

Changing that code snippet or swapping that form integration can mean a huge savings over time, and no need to reformat books, change ads, or try and redirect traffic to a new link. When you control the page, the link never changes.

By using your own website the power stays in your hands. If you ever get a new website, switch website providers, or anything else, don’t worry – that page structure is universal. It will always be yours and you will never have to change your newsletter link address again.

Your website is the only thing on the web you actually own. Not social media, not advertising, and not anything else anyone ever gives you.

Use that asset to keep control of both your online presence and your online marketing.

Good luck out there.

Filed Under: How To

Terms of Service · Acceptable Use · Privacy Policy

Copyright © 2025 · Powered by ModFarm Design · Log in

We use cookies to ensure that we give you the best experience on our website. If you continue to use this site we will assume that you are happy with it.Accept